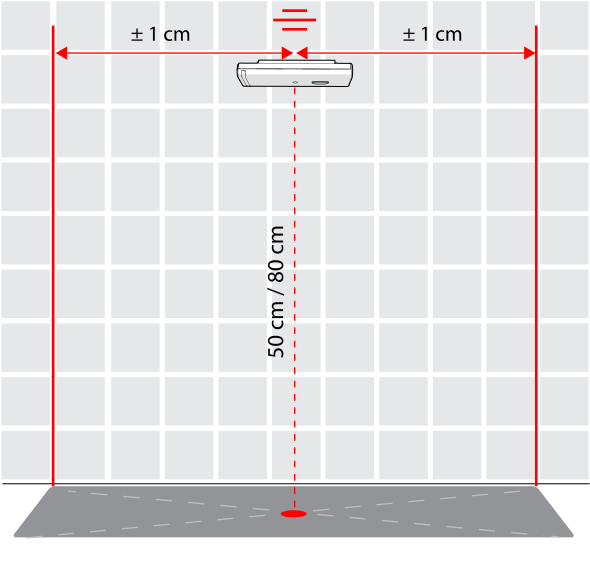
Measure and mark a spot on the wall. Clean the surface thoroughly. For a standard stove (typically 60 cm wide), make a mark at a height of 50 cm. For a wide stove (typically 80-90 cm wide), make a mark at a height of 80 cm. See Option A.
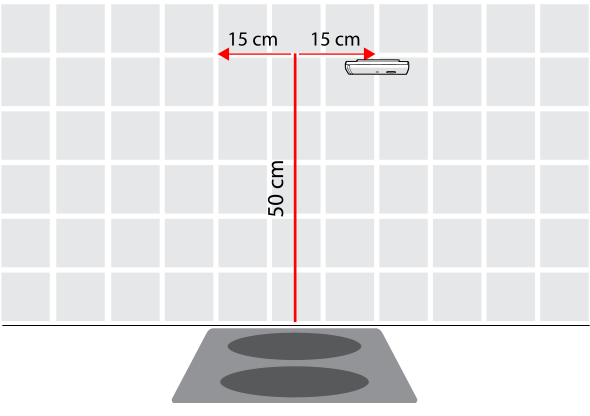
If you have a narrow stove, such as a compact two-burner cooktop, the Sensor Unit must not be installed on the center line of the stove. Instead, install it with an offset of 15 cm to either side, as shown in Option B.
OPTION AOPTION B
Remove the Flat Bracket. Slide the Wall bracket onto the back of the Sensor Unit.
Note: Make sure that the bracket clicks into place and is firmly attached to the Sensor Unit.
Remove the protective film from the adhesive tape at the side of the Wall bracket.
Position the Sensor Unit with the Wall bracket so that the sensor button is on the right-hand side and the adhesive tape is facing the wall.
Lift the Sensor to the chosen installation spot on the wall.
Firmly press and hold the Sensor Unit against the wall for one minute to make sure that it is properly attached to the wall.
Change the settings in Innohome EVO App regarding the installation place and height, stove width and stove type. Or follow the instructions for the one-button interface: for narrow stoves (typically 30 cm wide) and standard cooktops (typically 60 cm wide), see Changing the installation zone. For stoves wider than 60 cm (typically 80-90 cm wide), see Selecting the wide stove setting.